
 Background BackgroundIn order to understand many of the important water-related issues that society faces, students need to understand the existence and dynamics of watersheds (a.k.a. drainage basins). This will help them realize how an abandoned mine can cause the presence of dissolved metals in a stream many miles from the mine site, and how farming practices in the Midwest can contribute to a "dead zone" in the Gulf of Mexico. This activity will help students learn about the watersheds, giving them the foundation needed to understand these issues. Materials
Learner Outcomes
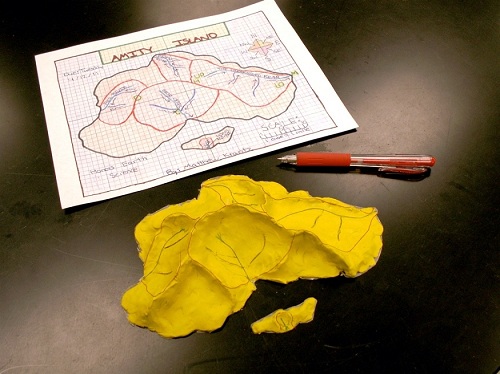
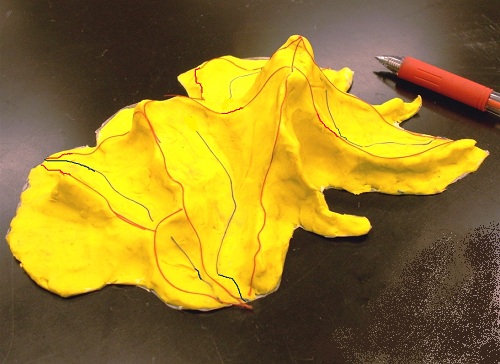
Procedures: To print a copy (pdf file) of the student worksheet, CLICK HERE (see below for a revised handout that eliminates the use of red thread). 2. Use an eyedropper containing water to determine the approximate location of 4 (or more) of the island's largest rivers. Do this by gently dropping water from 3-6 cm above different locations on the island as shown below. Watch the path of the drops as they run off the island. If a drop gets "stuck", simply add more water to the drop. Eventually it should flow off the island. "Suck" the water up with the eye dropper after it runs off the island. You may reshape the island to get the rivers where you want them to be. 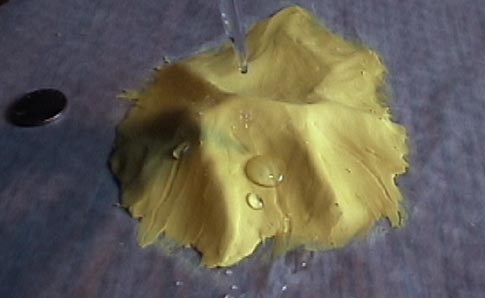 3. Once you are satisfied with the drainage of the island, use pieces of blue thread to mark the location of the island's 4 (or more) major rivers. Press the thread gently into the clay to keep it in place. You will need scissors to cut the thread. 4. Next, use pieces of red thread to mark the boundaries of the watersheds of each river that you have identified (at least 4). CLICK HERE to see another example. IMPORTANT: Instead of using red thread to mark the watershed boundaries, you may have them simply use a pencil to scratch a dashed line into the clay. This will save a significant amount of time. Here is a student handout that includes this change: Revised Island Watershed Activity (2014) 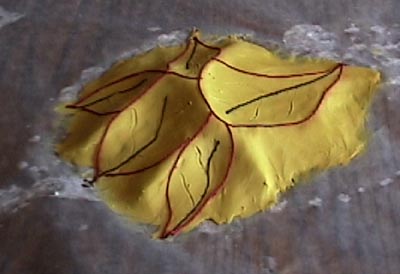 Here are some common mistakes:
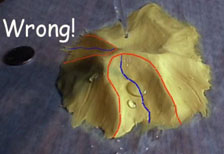 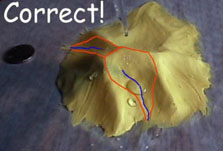 Above: The image on the left shows three common mistakes. For one, rivers do not typically originate at the highest point in a watershed. Usually, the headwaters are some distance below that point as shown on the right. Secondly, the divides are drawn incorrectly. They include more land (near the coast) than they should. The image on the right shows more realistic watershed boundaries. Finally, in the image on the right, there is a gap between boundaries of the two basins. In reality, water at the top of that ridge will drain into one basin or the other, so a single line (divide) like that shown on the right would be correct. 5. Have your instructor check your island before going to the next step. 6. Lightly scratch the clay with the tip of a pencil to show the possible locations of 2-5 tributaries for each stream that you have identified with blue thread. 7. Next, make a map of your island. First, use scissors to cut along the shoreline of your island. Place the model onto a piece of graph paper, and then trace the edge of the island onto the paper. Set the model aside and draw each of the following onto the map: major rivers (blue), tributaries (blue), boundaries of drainage basins (red). 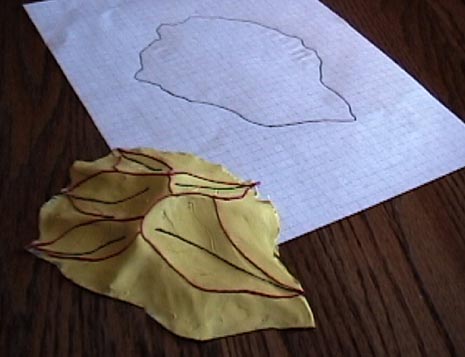 8. Do each of the following to your map: a. Identify which direction will be "north". Position your map so that NORTH is a the top and then keep it in this position as you label it . . . so that the labels are all oriented the same way (right-side-up) as your teacher checks the map to determine your score. 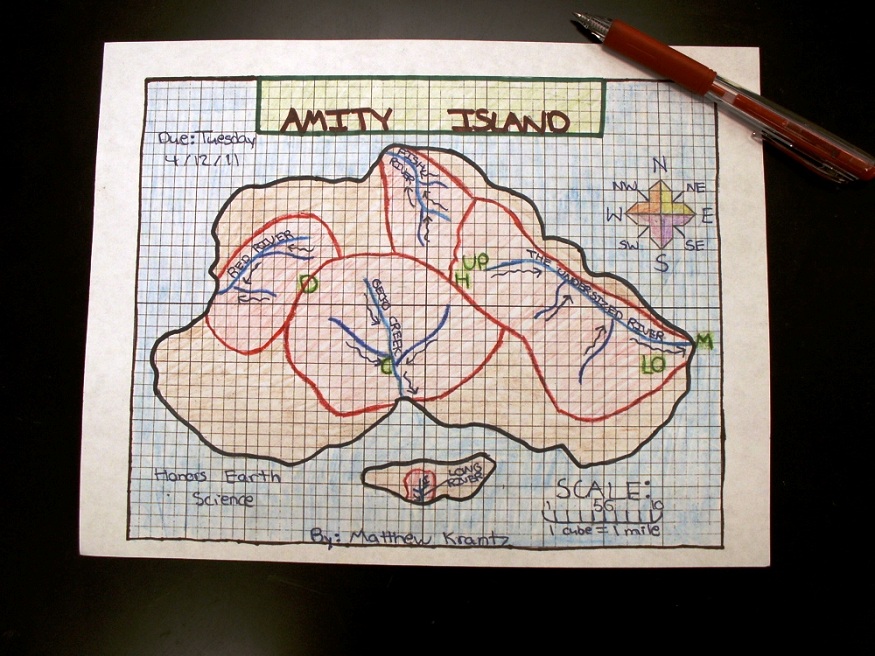 Here are some possible extension activities. A. Imagine that there is a city near the mouth of the river that has the largest watershed that depends on this water for its people. Think of a potential problem in the upper part of this basin that threatens this water supply. On a separate sheet of paper, write a newspaper article (complete with title) describing the problem and explaining how it will impact the water supply for the city. (3-5 good paragraphs should do) B. Obtain a piece of 12" x 18" construction paper. Draw and color a scene that shows a portion of one of the watersheds on your island. The scene should include the river and vegetation, as well as whatever else you envision present in the area. C. Find a news article about an issue in your local (or regional watershed). Write a summary of the article and then come up with 5 "critical thinking questions" about the issue. |
 |
The Watershed of the Yellowstone River |
|
Montana Earth Science Pictures of the Week |
|
Susquehanna River |
|
Delaware River |
|
Red River of the North |
|
Sacramento River |
|
Clark Fork River |